Make a cute DIY snowman ornament to give as gifts or for your tree. You can make several farmhouse bead ornaments with these easy wooden snowman ornament craft instructions.

One way of celebrating the season is making Christmas ornaments and crafts. We always enjoy making old favorites but it’s also fun to have a few new ones like this Snowman ornament craft. We are dipping our toes into farmhouse bead ornaments since we made our Bead Napkin Rings for Thanksgiving.
This post contains affiliate links which means if you make a purchase we might receive a small commission at no additional cost to you.
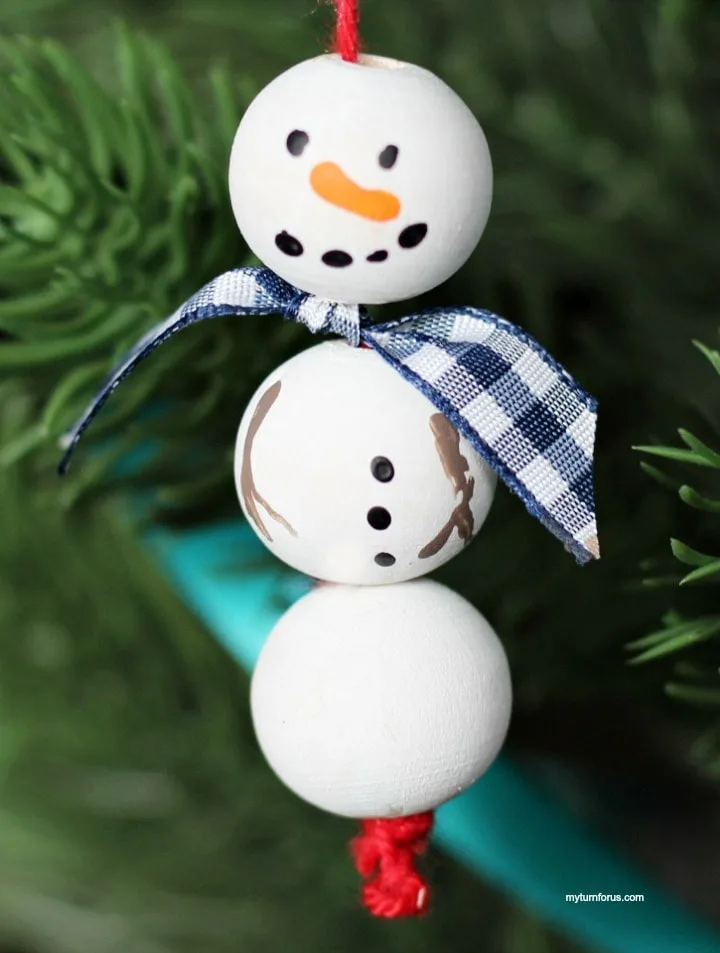
You can turn simple unfinished wood beads into an adorable DIY snowman ornament. This is a great snowman ornament craft to do with the kids or whip up up a batch of them yourself while sipping cocoa or eggnog. Besides using these farmhouse bead ornaments to decorate the tree they make great package toppers. And you can also add them to wreaths or swags of greenery for a little winter cheer. Make each one unique by switching up the face or adding different colors of ribbon.
What you will need for this snowman ornament craft:
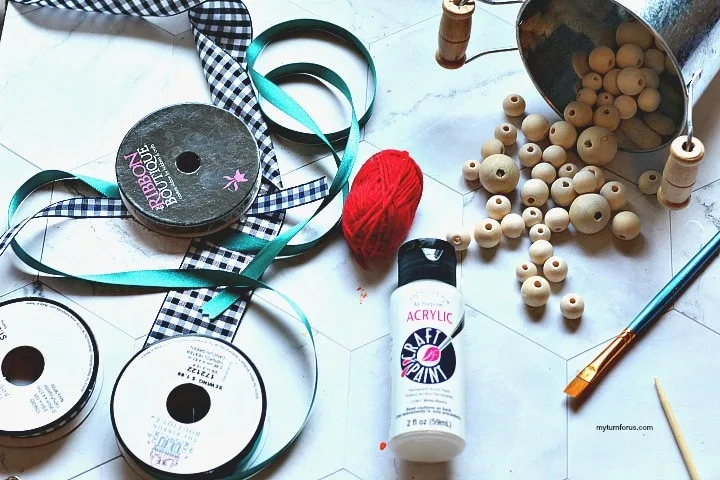
Supplies needed:
- 20 mm unfinished wood beads
- White, acrylic paint
- Black acrylic paint
- Orange acrylic paint
- Brown acrylic paint
- Twine or string
- Quarter-inch wide ribbon
Tools:
- Paintbrush
- Wooden skewer
How to make a wooden snowman ornament:
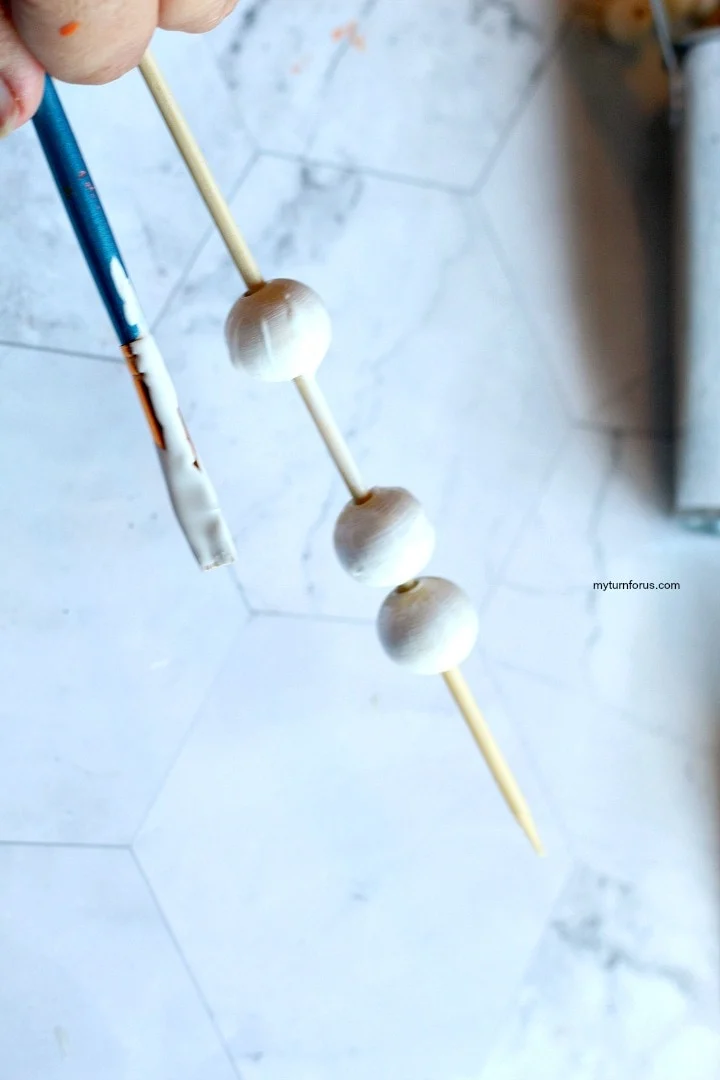
Slide 3 wooden beads over the skewer, make sure you leave plenty of space in between so that you can paint all sides of the bead. Give each bead a nice light coat of white paint and then allow them to dry. Apply a second coat of paint and allow it to dry completely.
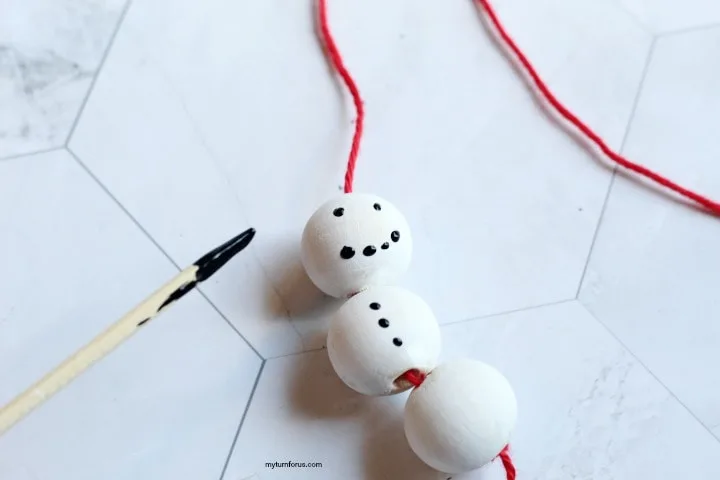
Slide your beads onto the String/twine. Use the backend of a very small paintbrush to add black dots for the ice mouth and buttons.
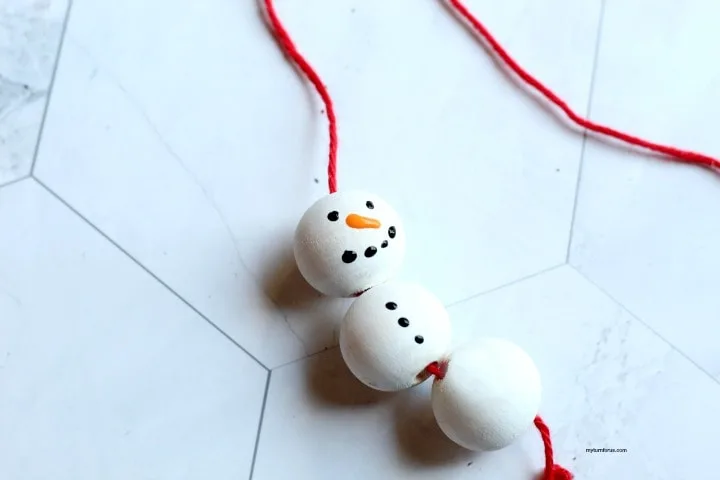
Use the black backend of a small paintbrush again or you can also use the tip of the skewer to draw out a long orange carrot nose. Let your details dry well. Optional: paint stick arms on each side of the buttons with light brown paint.
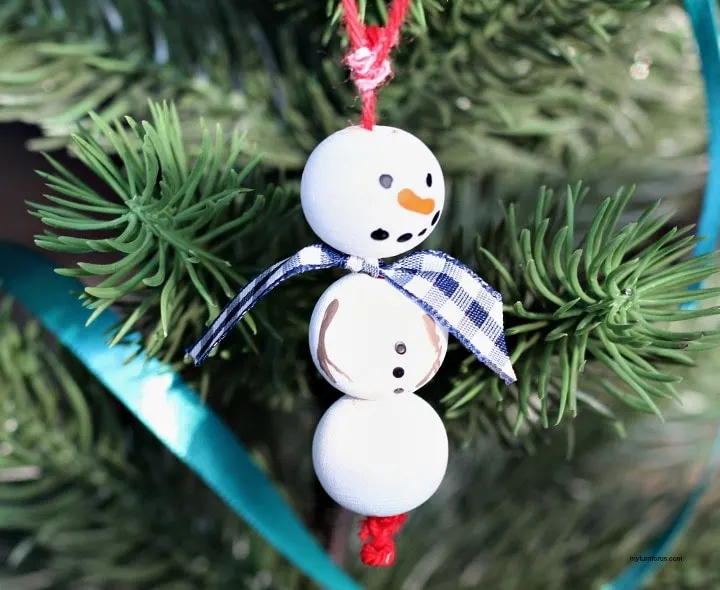
Wrap a small piece of ribbon around the neck like a scarf and secure it into the place where you want it with a dab of glue. Tie several knots at the end of the string below your snowman so that it is larger than the hole on your beads and your snowman will not slip off the end of the string. At the other end tie a loop with the string for hanging. Your wooden snowman ornament is now done and ready to enjoy.
Other DIY Christmas Crafts:
- Mason Jar Ring Snowman Ornament
- Wine Cork Wreath
- DIY Personalized Family Christmas Ornaments
- Easy Ombre Crafts Ornaments
Click HERE to save this DIY snowman ornament to Pinterest
Wooden Farmhouse Bead Snowman
Equipment
Ingredients
Instructions
- Slide the wooden beads over the skewer, make sure you leave plenty of space in between so that you can paint all sides of the bead. Give each bead a nice light coat of white paint and then allow it to dry.
- Apply a second coat of paint and allow it to dry completely.
- Slide your beads onto the String/twine.
- Use the backend of a very small paintbrush to add black dots for the ice mouth and buttons.
- Use the black backend of a small paintbrush again or you can also use the tip of the skewer to draw out a long orange carrot nose.
- Optional: paint stick arms on each side of the buttons with light brown paint.
- Let your painted details dry well.
- Wrap the ribbon around the neck like a scarf and secure it into the place where you want it with a dab of glue.
- Tie several knots at the end of the string below your snowman so that it is larger than the hole on your beads and your snowman will not slip off the end of the string.
- At the other end tie a loop with the string for hanging.
- Your snowman is now done and ready to enjoy.


